Tuesday, 22 October 2013
Wednesday, 4 September 2013
Procedure to configure Apache Virtual Host with URL Redirection in Windows
Step 1) Open hosts file in notepad or text
editor and add your host names in that file.

On a separate line enter 127.0.0.1,
followed by some space and the name of the virtual host you want to register in
DNS.
For example:
127.0.0.1 dizzyworld.benefits.com
127.0.0.1 dizzyworld.messaging.com

Add any further virtual hosts, each one on
a separate line and pointing to the same IP address (127.0.0.1). Save the hosts
file, and close it.
Step 2) Now Open in notepad and edit httpd.conf file in conf folder of Apache
home.
Goto
C:\Program Files\Apache Software Foundation\Apache2.2\conf

And Uncomment the following line in the
Virtual hosts Include section
#Virtual hosts
Include
conf/extra/httpd-vhosts.conf

Save and close it.
Step 3) Open httpd-vhosts.conf in notepad
and add the virtual hosts configurations in that file.
Goto C:\Program Files\Apache Software
Foundation\Apache2.2\conf\extra\

Open httpd-vhosts.conf file and following lines.
NameVirtualHost
dizzyworld.benefits.com:80
<VirtualHost
dizzyworld.benefits.com:80>
ServerAdmin webmaster@dizzyworld.benefits.com
DocumentRoot "C:/Program Files/Apache
Software Foundation/Apache2.2/docs/ dizzyworld.benefits.com "
ServerName dizzyworld.benefits.com
ServerAlias www. dizzyworld.benefits.com
ErrorLog "logs/ dizzyworld.benefits.com
-error.log"
CustomLog "logs/ dizzyworld.benefits.com
-access.log" common
RedirectMatch 301 ^/$ /benefits
Include conf/extra/benefits.conf
<Directory
/>
Options FollowSymLinks
AllowOverride None
Order deny,allow
Allow from all
</Directory>
</VirtualHost>
<VirtualHost
dizzyworld.messaging.com:80>
ServerAdmin webmaster@ dizzyworld.messaging.com
DocumentRoot "C:/Program Files/Apache
Software Foundation/Apache2.2/docs/ dizzyworld.messaging.com
ServerName dizzyworld.messaging.com
ErrorLog "logs/ dizzyworld.messaging.com
-error.log"
CustomLog "logs/ dizzyworld.messaging.com
-access.log" common
RedirectMatch 301 ^/$ /messaging
Include conf/extra/messaging.conf
<Directory
/>
Options FollowSymLinks
AllowOverride None
Order deny,allow
Allow from all
</Directory>
</VirtualHost>
benefits.conf

messaging.conf

Now save and check the syntax of the both httpd.conf and httpd-vhost.conf by using the following commands.

C:\Program Files\Apache Software Foundation\Apache2.2\bin>httpd -S

Step 4) Now restart the Apache Webserver using the following command
C:\Program Files\Apache Software
Foundation\Apache2.2\bin>httpd -k
restart

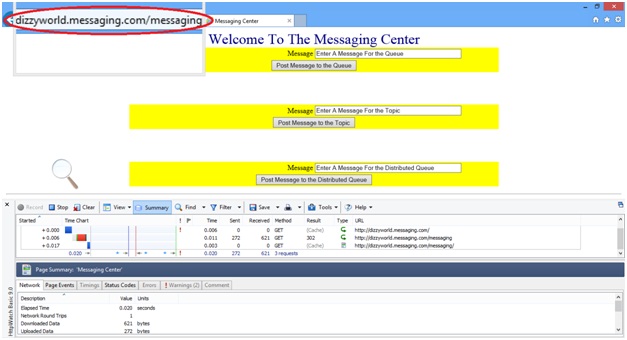
Step 5) Access the virtual host names you configured, it should be work now.
Open Browser and type the URL http://dizzyworld.benefits.com/ (it will redirected to benefits application)


Monday, 29 July 2013
Name based virtual host configuration in Apache
Step 1) Update the DNS entry in host file: Open hosts file which is located in: C:\WINDOWS\System32\Drivers\etc\hosts.file and add
your host names shown below

On a separate line enter 127.0.0.1, followed by some space
and the name of the virtual host you want to register in DNS.
For example: 127.0.0.1 dizzyworld.benefits.com
127.0.0.1 dizzyworld.messaging.com
Add any further virtual hosts, each one on a separate line and pointing to the same IP address (127.0.0.1). Save the hosts file, and close it.
Add any further virtual hosts, each one on a separate line and pointing to the same IP address (127.0.0.1). Save the hosts file, and close it.

Step 2) Edit httpd.conf file: Open httpd.conf file which is located in:C:\Program Files\Apache Software Foundation\Apache2.2\conf

And Uncomment the following line in httpd.conf file
#Virtual hosts
Include conf/extra/httpd-vhosts.conf
Include conf/extra/httpd-vhosts.conf
Save and then close it.

Step 3) Edit httpd-vhosts.conf file: Open httpd-vhosts.conf which is located under C:\Program Files\Apache Software Foundation\Apache2.2\conf\extra\ add the
virtual hosts configurations in that file.

Open httpd-vhosts.conf file and following lines.
<VirtualHost dizzyworld.benefits.com:80>
ServerAdmin webmaster@dizzyworld.benefits.com
DocumentRoot "C:/Program Files/Apache
Software Foundation/Apache2.2/docs/ dizzyworld.benefits.com "
ServerName dizzyworld.benefits.com
ServerAlias www. dizzyworld.benefits.com
ErrorLog "logs/ dizzyworld.benefits.com
-error.log"
CustomLog "logs/ dizzyworld.benefits.com
-access.log" common
<Directory
/>
Options FollowSymLinks
AllowOverride None
Order deny,allow
Allow from all
</Directory>
</VirtualHost>
<VirtualHost
dizzyworld.messaging.com:80>
ServerAdmin webmaster@ dizzyworld.messaging.com
DocumentRoot "C:/Program Files/Apache
Software Foundation/Apache2.2/docs/ dizzyworld.messaging.com
ServerName dizzyworld.messaging.com
ErrorLog "logs/ dizzyworld.messaging.com
-error.log"
CustomLog "logs/ dizzyworld.messaging.com
-access.log" common
<Directory
/>
Options FollowSymLinks
AllowOverride None
Order deny,allow
Allow from all
</Directory>
</VirtualHost>
Step 4) Check for the syntax:
Step 4) Check for the syntax:
Now save and check the syntax of the both httpd.conf and
httpd-vhost.conf by using the following commands.
C:\Program Files\Apache Software
Foundation\Apache2.2\bin>httpd -t

C:\Program Files\Apache Software
Foundation\Apache2.2\bin>httpd -S

Step 5) Create document roots for both virtual hosts: Create document root folders for the above two
virtual hosts inside the Apache2.2 folder under Apache Home.
C:\Program Files\Apache Software
Foundation\Apache2.2\docs (previously there is no docs folder, we have to
create docs folder under Apache2.2)

And create or copy html file inside the folders which we have created earlier.
document root 1: C:\Program Files\Apache Software Foundation\Apache2.2\docs\dizzyworld.benefits.com\index.html
document root 2: C:\Program Files\Apache Software Foundation\Apache2.2\docs\dizzyworl.messaging.com\index.html
Step 6) Restart Apache:
document root 1: C:\Program Files\Apache Software Foundation\Apache2.2\docs\dizzyworld.benefits.com\index.html
document root 2: C:\Program Files\Apache Software Foundation\Apache2.2\docs\dizzyworl.messaging.com\index.html
Step 6) Restart Apache:
Restart the Apache Webserver using the following command
C:\Program Files\Apache Software
Foundation\Apache2.2\bin>httpd -k
restart

Step 7)Test virtualhost configuration: Access the virtual host names you configured.
Open Browser and type the URL http://dizzyworld.benefits.com/


How To Setup Apache Virtual Host Configuration in unix
(With Examples)
Using Apache Virtual Host, you can
run several websites on the same server.

For example, I can run both
thegeekstuff.com and top5freeware.com on a single physical server that has one
Apache webserver running on it.
Fig: Apache Virtual Host (Multiple
websites, one Apache)
There are two types of Apache virtual host configurations: 1) IP-Based Virtual Host and 2) Name-based Virtual Host. Name-based virtual host is recommended for most scenarios.
IP-Based
Virtual Host
In this configuration, when you are
pointing two websites (with different ip-address) to the server that runs
Apache, that physical server should have two different ip-address configured.
This means that the server should
have two ethernet cards, each one of them configured to the ip-address of the
corresponding website that Apache virtual host will be serving. So, this is not
practical for most aspects, and you should not be using this.
In the following example, the server
contains two NIC cards, one is configured with 192.168.101.1 ip-address for
thegeekstuff.com, another is configured with 192.168.102.1 for
top5freeware.com. Both these ip-address are served by a single Apache webserver
running on that server using IP-Based virtual host.

Name-Based
Virtual Host
In this configuration, when Apache
webserver receives a request, it looks for the hostname in the HTTP header, and
depending on the hostname, it servers different websites. This is very easy, as
you need only one ip-address on that physical server; but, you update the DNS
with multiple website names pointing to the same ip-address. For all practical
purpose, you’ll be using only Name-based virtual host configuration.
In the following example, the server
contains only one NIC card, which is configured with 192.168.101.1 ip-address.
The DNS entry for both thegeekstuff.com and top5freeware.com website points to
192.168.101.1 ip-address. When Apache recives a request, it looks for the
hostname entry in the HTTP header, and serves the corresponding website.

Fig: Apache Name-Based Virtual Host
1.
Uncomment httpd-vhosts.conf in httpd.conf
If you’ve installed Apache 2 from source, by default, the following line will be commented in the
httpd.conf file. Uncomment this line.
#
vi /usr/local/apache2/conf/httpd.conf
Include
conf/extra/httpd-vhosts.conf
2.
Setup virtual hosts
Modify the httpd-vhosts.conf as
shown below to setup named-based virtual host setting for two hosts.
- NameVirtualHost *:80 – Indicates that all the
name-based virtual hosts will be listening on the default port 80
- <VirtualHost *:80> </VirtualHost> – Enclose
all the apache configuration parameters for each and every virtual host
between these VirtualHost tags. Any apache directives can be used within
the virtualhost container.
- In the following example, we are setting up virtual
host for thegeekstuff.com and top5freeware.com listening on the same port
80. So, there will be two <VirtualHost *:80> </VirtualHost>,
one for each website.
- When you go to thegeekstuff.com, the files under
/usr/local/apache2/docs/thegeekstuff will be served by Apache; and the
access_log and error_log for this site will go under
/usr/local/apache2/logs/thegeekstuff
Subscribe to:
Posts (Atom)