Login into AWS account and click on EC2

In the navigation pane, under NETWORK & SECURITY,
select Key Pairs.

Create key
pair and give a name and type as RSA and private key file format as .ppk for
PUTTY compatibility

Click on create key pair, A private file gets downloaded
automatically

The Choose an
Amazon Machine Image (AMI) page displays a list of basic configurations called
Amazon Machine Images (AMIs) that serve as templates for your instance. Select
the HVM edition of the Amazon Linux AMI.

·
Scroll
down and select the key pair you created in the creating a key pair section
above or any existing key pair you intend to use.
·
Select
an existing security group.
·
Select
the security group that you created.
·
Select
Launch Instance.

In the left-hand navigation bar, choose Instances to view the
status of your instance. Initially, the status of your instance is pending.
After the status changes to running, your instance is ready for use.

Installing and configuring
Jenkins
Now that the Amazon EC2
instance has been launched, Jenkins can be installed properly.
In this step you will deploy
Jenkins on your EC2 instance by completing the following tasks:
- Connecting to your Linux instance
- Downloading and installing Jenkins
- Configuring Jenkins
Connecting to your Linux
instance
After you launch your
instance, you can connect to it and use it the same way as your local machine.
Before you connect to your
instance, get the public DNS name of the instance using the Amazon EC2 console.
Select the instance and locate
Public DNS.

Prerequisites
The tool that you use to
connect to your Linux instance depends on your operating system.
If your computer runs Windows,
you will connect using PuTTY.
If your computer runs Linux or
Mac OS X, you will connect using the SSH client.
These tools require the use of
your key pair. Be sure that you have created your key pair as described in
Creating a key pair.
Using PuTTY to connect to your instance
- From the Start menu, select All Programs > PuTTY > PuTTY.
- In the Category pane, select Session, and complete the following fields:
- In Host Name, enter ec2-user@public_dns_name.
- Ensure that Port is 22.

·
In the Category pane, expand Connection, expand SSH, and then select
Auth. Complete the following:
·
Select Browse.
·
Select the .ppk file that you generated for your key pair, as described
in Creating a key pair and then select Open.
·
Select Open to start the PuTTY session.

Downloading and installing Jenkins
Completing the previous steps enables
you to download and install Jenkins on AWS. To download and install Jenkins:
1.
Ensure that your
software packages are up to date on your instance by using the following
command to perform a quick software update:
[ec2-user ~]$ sudo yum update –y
2.
Add the Jenkins repo
using the following command:
3.
[ec2-user ~]$ sudo wget -O
/etc/yum.repos.d/jenkins.repo \
https://pkg.jenkins.io/redhat-stable/jenkins.repo
4.
Import a key file from
Jenkins-CI to enable installation from the package:
[ec2-user ~]$ sudo rpm --import
https://pkg.jenkins.io/redhat-stable/jenkins.io-2023.key
[ec2-user ~]$ sudo yum upgrade
5.
Install Java (Amazon
Linux 2):
[ec2-user ~]$ sudo amazon-linux-extras install java-openjdk11 -y
6.
Install Java (Amazon
Linux 2023):
[ec2-user ~]$ sudo dnf install java-11-amazon-corretto -y
7.
Install Jenkins:
[ec2-user ~]$ sudo yum install jenkins -y
8.
Enable the Jenkins
service to start at boot:
[ec2-user ~]$ sudo systemctl enable jenkins
9.
Start Jenkins as a
service:
[ec2-user ~]$ sudo systemctl start jenkins
You can check the status of the
Jenkins service using the command:
[ec2-user ~]$ sudo systemctl status jenkins
Configuring Jenkins
Jenkins is
now installed and running on your EC2 instance. To configure Jenkins:
Connect to http://<your_server_public_DNS>:8080
from your browser. You will be able to access Jenkins through its management
interface:

·
As
prompted, enter the password found in
/var/lib/jenkins/secrets/initialAdminPassword.
·
Use
the following command to display this password:
·
[ec2-user
~]$ sudo cat /var/lib/jenkins/secrets/initialAdminPassword
·
The
Jenkins installation script directs you to the Customize Jenkins page. Click
Install suggested plugins.
Once the installation is complete, the Create First Admin User will open. Enter your information, and then select Save and Continue.

1.
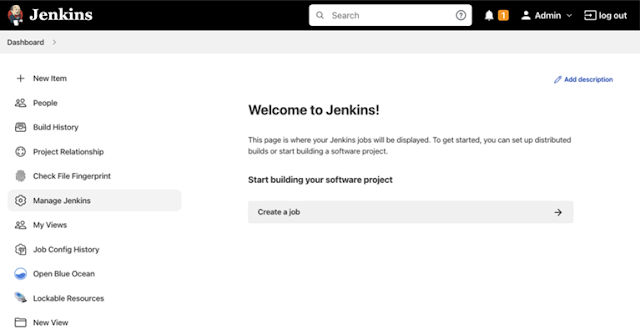
On
the left-hand side, select Manage Jenkins, and then select Manage Plugins.
2.
Select
the Available tab, and then enter Amazon EC2 plugin at the top right.
3. Select the checkbox next to Amazon EC2 plugin, and then select Install without restart.

4.
Once
the installation is done, select Back to Dashboard.
5.
Select
Configure a cloud if there are no existing nodes or clouds.

If you already have other nodes or clouds set up, select Manage Jenkins.
After navigating to Manage Jenkins, select Configure Nodes and Clouds from the left hand side of the page.
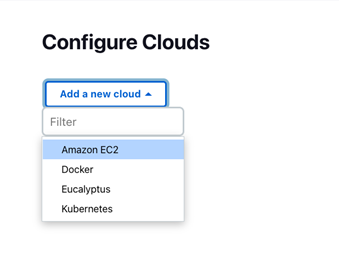
a. From here, select Clouds.

- Select Add
a new cloud, and select Amazon EC2. A collection of new
fields appears.
 .
Click Add under
Amazon EC2 Credentials
.
Click Add under
Amazon EC2 Credentials
a. From the Jenkins Credentials Provider, select AWS Credentials as the Kind.

a. Scroll down and enter in the IAM User programmatic access keys with permissions to launch EC2 instances and select Add.

- Scroll down to select your region using the
drop-down, and select Add for the EC2 Key Pair’s Private
Key.

a.
From the Jenkins
Credentials Provider, select SSH Username with private key as the Kind and set
the Username to ec2-user.

a.
Scroll down and
select Enter Directly under Private Key, then select Add.

a.
Open the private key
pair you created in the creating a key pair step and paste in the contents from "-----BEGIN RSA PRIVATE
KEY-----" to "-----END RSA PRIVATE KEY-----". Select Add when
completed.

a.
Scroll down to
"Test Connection" and ensure it states "Success".
Select Save when done

Now you are ready to use EC2 instances as
Jenkins agents.
No comments:
Post a Comment